
To use the DIY drawing projector you'll need:
- transparency film- a pen for writing on transparency film
- tape
- scissors (to cut the transparency film into small pieces)
- ruler
- computer and printer
The principle of the drawing projector is the following:
First, you need to transfer your image of choice in the right size (see “Step 1”) onto a piece of transparency film. Next, place this piece of transparency film on the CD jewel case, and switch on the flashlight. The image will be projected onto your cookie. You can now trace it with an edible food marker or a piping bag (filled with icing).Step 1: Choosing the right size of the image on transparency film.
How do we know which size to choose for the image? To find out the right size, we need to build a tool (once we have built it, we can use it for every cookie we are going to decorate):Take a piece of transparency film and draw lines of different length on it (see left picture). I started with a line of 1 cm / 0.4 in., and finished with a line of 6 cm / 2.4 in. (increasing the length in 0.5 cm / 0.2 in. increments). Write down the length of each line (1 to 6 cm) on the sheet as well. Put this piece of transparency film on the CD jewel case, switch on the flashlight, and place your cookie (or cookie cutter) on the projection of the lines. Now you can see, how long the lines are on the cookie (see right picture). For the cookie on the right picture, I chose a width of 4.5 cm / 1.8 in. for the image on the transparency film.
 |
| The piece of transparency film with the lines on it (left side) is a tool for finding out the right size for the image on transparency film. |
Step 2: Transferring the image onto transparency film.
It's good to have a digital version of your image of choice on your computer (e.g., by scanning the image, or taking a picture of it). Resize the image to the “right” size (e.g., with a text processing program).There are different ways to transfer the image onto the transparency film. In this example, I printed the image (4.5 cm in width) on a piece of paper (see picture below). Afterwards, I traced the printed image onto transparency film with a pen. As your cookies may vary a bit in size, you may want to also print the image a little bit larger (5 cm / 2in.) and a little bit smaller (4 cm / 1.6 in.) than the "right" size.
Alternatively, you can print the image directly onto transparency film. Make sure, that the transparency sheet you're using is compatible with your model of printer (ink-jet or laser printer).
After you've decorated your cookies, you can store the piece of transparency film with the image on it for later usage. |
| I printed the image of choice in three different sizes (width: 5cm, 4.5cm and 4 cm) on a piece of paper. Afterwards, I traced the image onto a piece of transparency film with a pen. |
Step 3: Projecting the image onto your cookie.
Place the piece of transparency film (with the image on it) on the CD jewel case. Fix it with some tape, to make sure it doesn't slip out of place. Now you can switch on the flashlight. The image will be projected onto the lower surface of the projector. Place your cookie on this position. Trace the projected image with a piping bag filled with Royal Icing or with a food marker. It might take some time until you know how to hold your hand so that the shadow of your hand doesn’t always get in the way.
A quick tip: If the projected image is too large for your cookie, you can make it a little bit smaller by lifting the cookie up (e.g., by placing it on a tin).
 |
| Place the piece of transparency film (with your image on it) on the CD jewel case.
When you switch on the flashlight, the image will be projected onto the cookie.
You can now trace the image with your piping bag (filled with Royal Icing) or an edible food marker. |
Done! To work with the drawing projector place it on a table or a desk.
Here are some examples of projected images on cookies:
On the left side, you see the image on transparency film,on the right side, you see the projected image on the cookie.
 |
| Image traced by hand (on a pale cookie and a dark cookie). |
 |
| Printed image. The lines were a bit too thin |
 |
| Printed image with thicker lines. |
 |
| Image traced by hand in different colors. |
 |
| Projection of a cut-out shape (on a pale cookie and a dark cookie). |
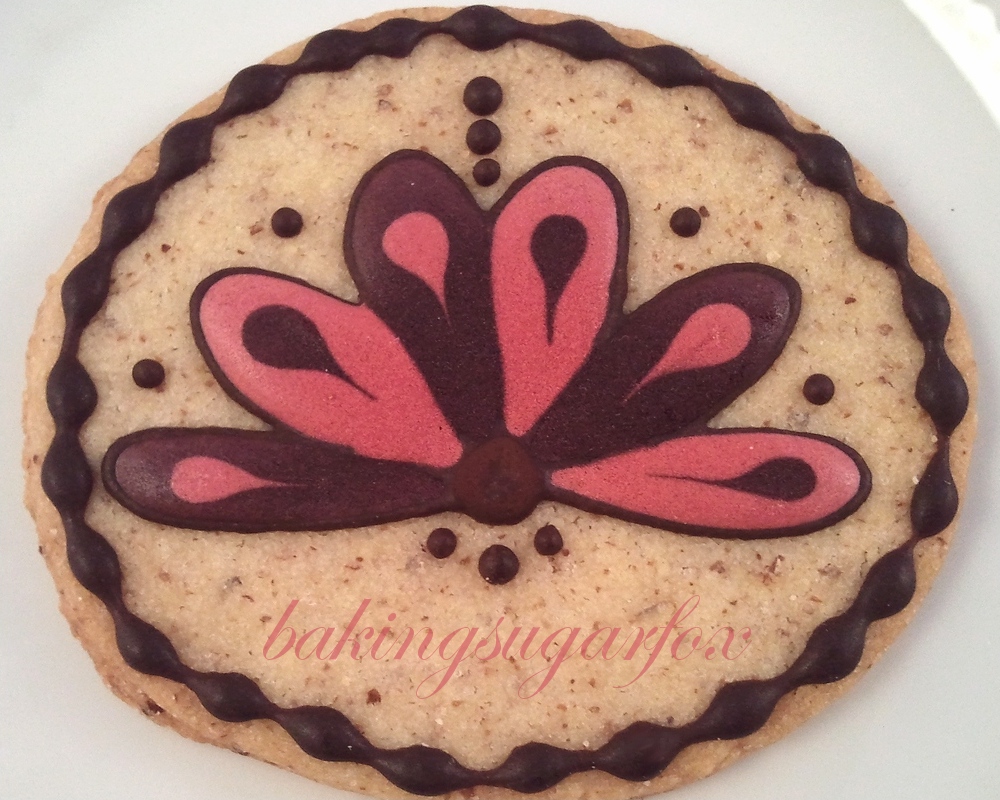
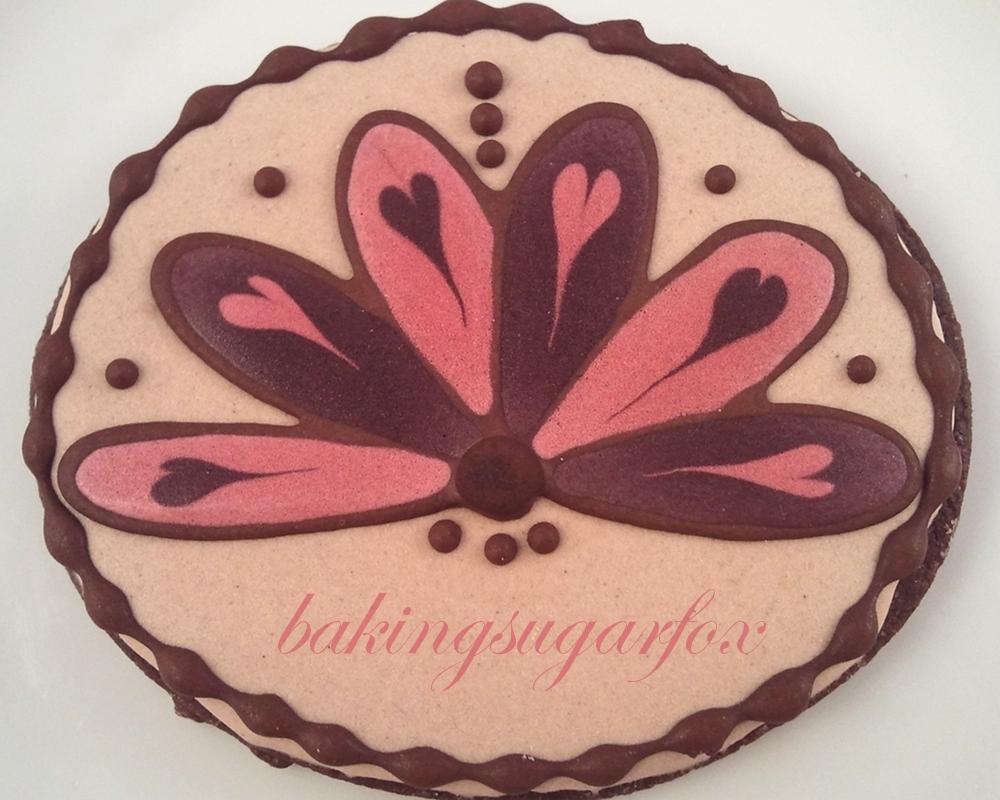
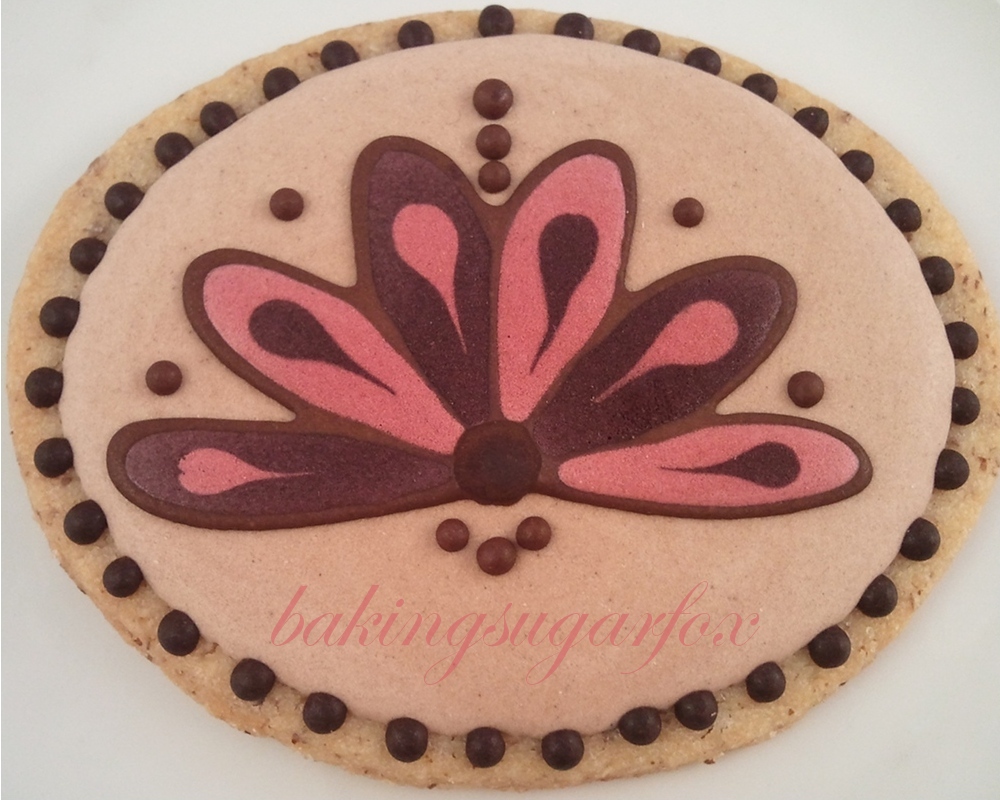
Here are the decorated cookies!
I flooded the different sections of the image with colored icing. |
| Decorated cookies. |
Have fun decorating!
i can't thank you enough for this tutorial! I'm gonna try it right now!
ReplyDeleteHi Connie. Thanks for your comment! I'm glad the tutorial inspired you to build your own projector :-)
DeleteWonderful concept! I was wondering if anyone out there has tried this projector. My husband made one for me; the problem is the image on the transparency film has to be soooo tiny to fit even on a medium-sized cookie. Maybe transferring an image to a cake would be better. Thanks for the directions... though if anyone has an idea to help make this better for working on cookie-sized shapes, please post here. thanks
ReplyDeleteHi! You are right, if your cookies are rather small, the image on the transparency film needs to be quite tiny. For tiny images, I usually get the best results by using a printer, as you can print very fine lines with it.
DeleteAnother thing you could try is to lift your cookie up, so that it comes closer to the CD jewel case. For my projector, there is only a distance of about 23 cm (9 in.) between the cookie and the CD surface. The larger this distance is, the smaller the image on the transparency film needs to be in order to fit on the cookie.
I hope this helps a bit! Best wishes! Anna
I am going to try this. So nice to have an option to try before investing in expensive equipment. Thank you so much for the easy-to-understand instructions/tutorial. Can't wait to try it out!! Thanks, again. Tracy's Treats
ReplyDeleteThank you very much for your comment, Tracy!
DeleteI was wondering if the image would be sharper/better defined if you used a piece of glass (like from a picture frame) instead of a jewel case?? Just curious.
ReplyDeleteYou're right. Maybe the projected image would be sharper when using a piece of glass. I haven't tried it myself, but if you do, I'll love to know whether it makes a difference compared to the jewel case. The reason I used the CD jewel case was that it is something probably everybody owns. Cheers! Anna
Deleteim soo glad the world have you.. thanks so muchh
ReplyDelete